Lowercase Letter W Craft for Preschool
Have you ever noticed that preschool kids often love the slimy, gooey, sticky things they find outside? Earthworms are a sheer delight to these kids. Your child can make this lowercase letter W craft in preschool to learn the shape and sound of W as they turn the letter into a worm.
This easy worm craft can be done in just a few minute’s time. It’s not complicated at all but does involve some cutting and gluing of pieces. The more your child can do on his or her own, the more beneficial the activity will be.
Take the time to practice the shape and sound of W as you make this craft with your child. Trace the letter before and after it is cut from the construction paper. Practice making the W sound together a few times.

Disclaimer: This blog post contains affiliate links. If you use them, I might be rewarded credit or a commission of the sale. Please note that I only recommend tools that I personally use and love and I always have my readers’ best interest at heart.
Learning the W Sound and Shape
If you have some extra time, try one of these activities to help your child learn the shape and sound of W. You’ll find even more ideas in the uppercase letter W craft.
Look for the letter W. Look around your home for the letter W on cereal boxes, books, and printed material. If you have old magazines, help your student look thru the magazine and cut out W letters and paste them on a piece of construction paper.
Set up a Letter W Scavenger Hunt. You can make your own W cards by using printer paper and writing the letter W on it six times and then cutting them out. These W cards can be hidden around your home for your student to find.
Set up a W-Sounds Scavenger Hunt. Go through each room of your home with your child, looking for items that begin with the W sound such as water, walls, workbooks, windows, and washcloths.
Brainstorm words that start with W. Suggest a few words like water, worm, or work to help get your child started. Ask him or her to name as many W words as they can think of in one or two minutes. You can increase this time if the activity seems difficult.
Read Books for the Letter W
Our Letter W Picture Books list has a nice selection of books about worms to go with this craft, books about watermelon to go with the uppercase craft, and miscellaneous books like Warning! Do Not Open This Book! which is one of my favorites. I highly recommend checking out as many of those books as you can from the library to enjoy while learning the letter W.
Educational Worm Toys Your Child May Love
- Get a worm farm and fill it with worms to watch how they work in the soil. This is a science activity your child won’t soon forget.
- Magic worm toys sometimes called worm pets.
- Try this Worm Puzzle made just for little hands.
Write the Letter W
Write starts with the letter W itself, so it seems like we shouldn’t pass up this opportunity to practice writing the letter W. Preschool children are usually not ready for handwriting paper and formal letter formation practice. However, you can use any large muscle writing activity to practice the W shape.
Have your student write on a window or mirror using window chalk. If you have a dry erase board and appropriate markers use that. Go outside and write the letter W with sidewalk chalk. Encourage your child to write the letter W as big as possible so that he or she is using all of the different muscle groups.
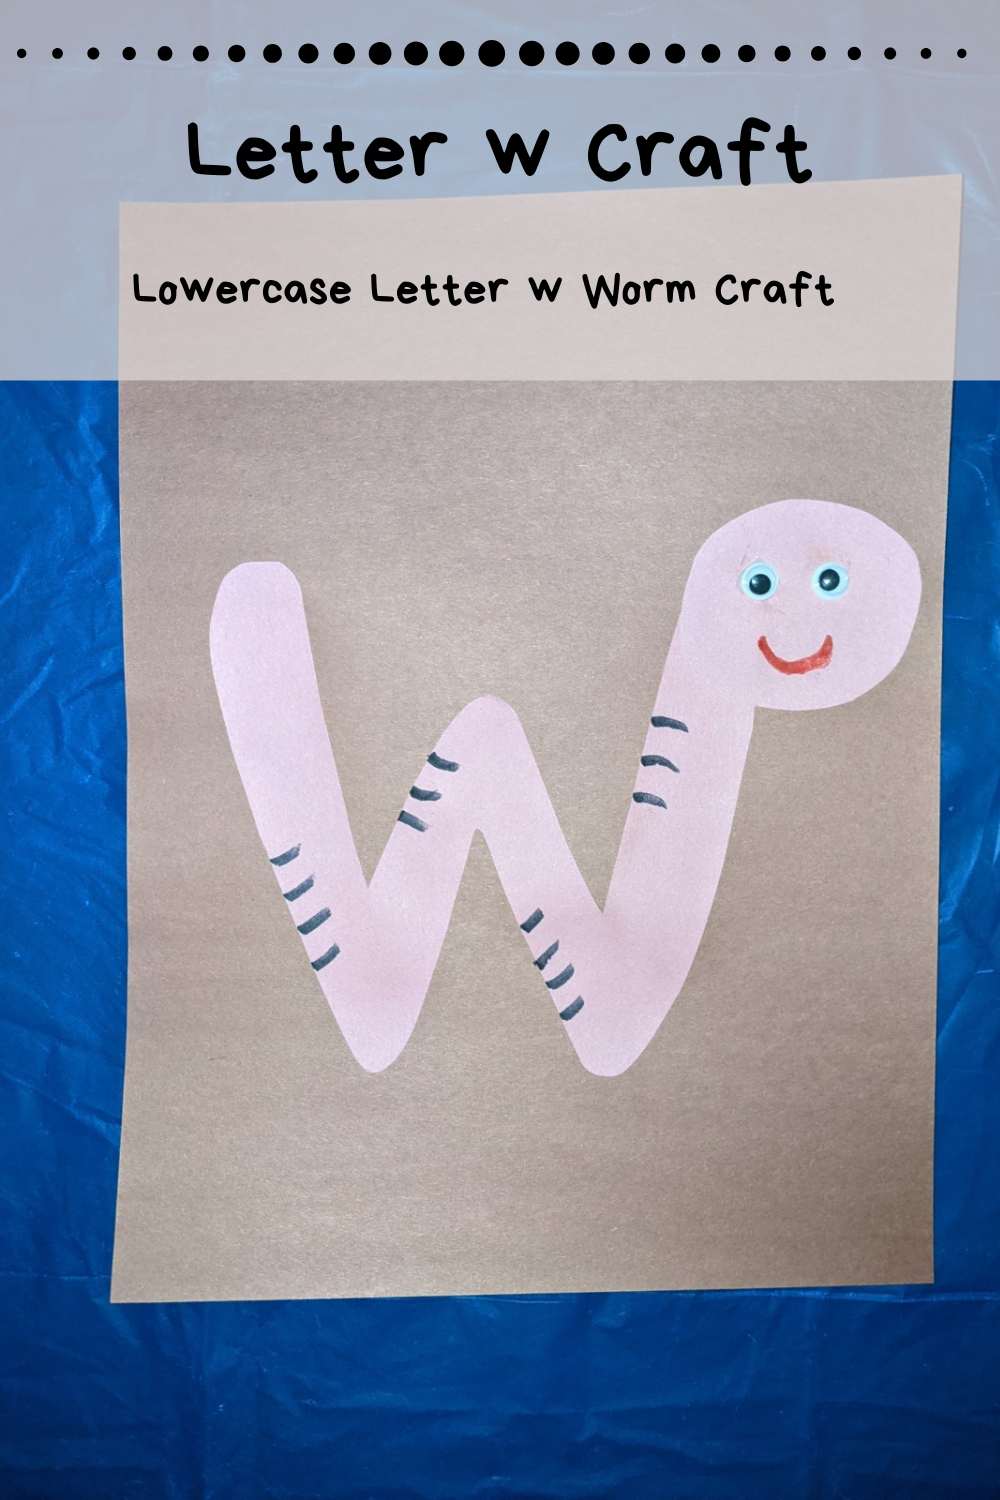
Materials for the Lowercase Letter W Craft

- pink construction paper
- construction paper for the background (color of choice)
- googly eyes
- red and black marker/crayon/pencil
- glue
- scissors
- alternative – white paper and crayons
Instructions for the Lowercase Letter W Craft

- Draw the cut pieces as shown in the image above for your child. Then have them follow the remaining instructions as do as much of the work as possible on their own.
- Cut out a lowercase w and a medium circle from the pink paper.
- Next, glue down the small w in the middle of the backing paper.
- Then glue down the circle on the top right of the w for the worms head.
- Next, glue down the googly eyes on the head.
- Then use your red marker/crayon/pencil to add a smile to your worm.
- Finally, use your black marker/crayon/pencil to add some wrinkles to your worm.
Related Posts

Circle Time for Preschool
Circle time for preschool is a wonderful way to begin your learning time together! Start…
July 12, 2021
Fun Ways to Learn the Alphabet
Have you made any of the letter crafts yet? If you are looking for fun…
June 8, 2021